
If you want to drive a 5×7 dot matrix display directly from your MCU, I have the right Arduino library for you. Flexible, easy to use, supporting low power operation, and a low memory footprint: DotMatrix5x7.
Motivation
 As I mentioned before, I love to construct little gadgets that interact with people in the context of geocaching. Typically, the geocacher has to perform some task such as walking to the summit of a hill before critical information such as a numerical code is revealed. These gadgets are often put into a PET preform tube, as you see in the picture to the right. Obviously, the range of interaction is very limited. There might be a button the user can press. Sometimes the only form of user input consists of moving the tube. The system output is limited to blinking LEDs and/or a seven-segment display. Using it, one can display a numerical code or coordinates. As you can see in the example, it is even possible to display some letters.
And here the problem starts. There exists a recommendation of how seven segment displays should be used to display all letters. However, some of the “letters” are not very obvious and others are easily confused with numbers.
In one of my geocaches, people have to spin around holding the PET preform tube. If they do it fast enough, they get the code for a lock. Otherwise, “bye” is displayed. However, people want to see numbers! So they hold the tube upside down and interpret the displayed characters as 349. ![]() The middle character is definitely not a four, but this is perhaps a display error, people might think.
The middle character is definitely not a four, but this is perhaps a display error, people might think.
Displays that are better suited to display letters are fourteen-segment displays or dot-matrix displays. Unfortunately, there are no fourteen-segment displays that fit into a small PET preform tube. However, there are 5×7 dot matrix displays that are only slightly larger than the seven-segment displays I used. Further, there exist super-bright types such as TA07-11SEKWA by Knightbright, which can be driven directly by MCU pins.
LED dot-matrix displays
There exist different types of LED dot-matrix displays. Some have a size of 8×8, some 5×7, some even use RGB LEDs. There is one thing they all have in common, though. They are multiplexed displays. This means that you cannot light one of the dots independently of all the others. In fact, if you would like to do that, you would need 36 pins for a 5×7 display. These displays, however, have only 12 pins. 5 column pins and 7 row pins. Below, you see an example with column anodes, i.e., all the LED anodes are connected to column pins.

When you now want to display a character using this display, the row pins have to be connected to GND one after the other. While a particular row is active 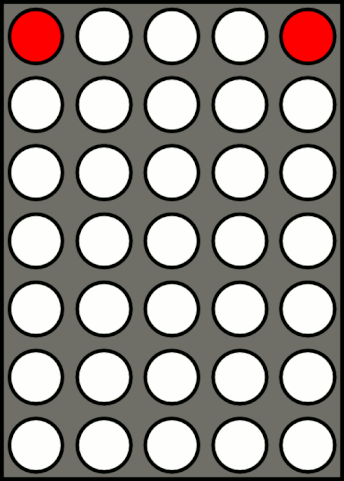 (connected to GND), the column pins corresponding to the dots that should light up in this row have to be connected to Vcc (via a current-limiting series resistor). If you do that fast enough, for instance, by activating each row pin only for 1 ms, persistence of vision leads to the impression that a character is displayed as is sort of demonstrated in the animated GIF by Laserlicht as shown to the right.
You may ask whether it is possible to use column multiplexing instead of row multiplexing as described above. Yes, you can! The disadvantage is that you need 7 series resistors instead of 5 and that 7 LEDs may have to be lit up at the same time, implying a potentially larger current for the active column pin compared with the maximal current for a row pin when row multiplexing.
Driving a dot-matrix display
The usual way to drive such a display is to use a driver IC such as MAX7921 that does all the heavy lifting. The MCU only has to send some commands via the I2C bus to the IC, and the IC does all the multiplexing. If you want to minimize the number of ICs and have unused MCU pins anyway, then multiplexing can also be done by the MCU itself. An example of this is Hacklace2. Unfortunately, this kit is not available anymore.
As mentioned above, setting up your MCU to drive a 5×7 dot matrix display is straightforward. Connect the seven row pins directly to 7 MCU pins, and connect the five column pins over series resistors to MCU pins. So what is a good value for the series resistor? It all depends on which MCU you use, what voltage is supplied, and how bright the display should appear.
As an example, let us assume the super-bright display TA07-11SEKWA and an ATtiny1634 with a supply voltage of 3.6 volts. 3 to 4 mA for each LED should be OK, even if each LED is powered only for 1/7 of the time (because of row multiplexing). Let us now have a look at the output voltage vs. sink and source current graphs at 3 volts Vcc.

So it looks as if up to 2 mA source and sink current, you can just subtract or add, respectively, 100 mV from or to the output voltage. For higher currents, it looks as if one can approximate the curve by assuming a resistor of roughly 50 Ω each (for the sink pin and for the source pin). The forward current of each LED is 2.0 V and the supply voltage of a 3.6 V battery drops by 0.1 V if around 10 mA are drawn. So, we have a voltage drop of 1.5 V over our series resistor (including the virtual sink and source resistors).
Let us assume a 330 Ω series resistor, which together with the virtual resistors at the two output lines adds ab to 430 Ω. 1.5 V / 430 Ω = 3.5 mA per LED. Note that when all five LEDs of a row are lit, the sink current will be 17.5 mA. As stated in the datasheet, this exceeds the test conditions (and might be lower for this reason) but is well below the maximum rating of 40 mA per pin.
Now you have simply to set the right pins to high or low in order to display a character using row multiplexing. Recipes for doing so can be found on the Arduino playground. However, what one really wants is a library that hides all the details and gives you a lot of flexibility. This is what I set out to provide with the DotMatrix5x7 library, which you can download from the GitHub repository or load with Arduino’s library manager.
DotMatrix5x7 library
The DotMatrix5x7 library implements multiplexing in an interrupt-driven way, i.e., after having called a display method, the selection of rows and columns as well as the timing is taken care of by timer interrupts. For this purpose, Timer1 is used by default (which can then not be used for other purposes such as PWM output, servo control, or tone generation). Alternatively, one can define the compile-time constant USETIMER0 in DotMatrix5x7.h. In this case, Timer0 (the one being used for millis and delay) is used without interfering with millis and delay. The trick the library uses here is to rely on the TIMER0_COMPA interrupt, as explained in an Adafruit tutorial on timer interrupts. The only drawback is that the interrupt frequency is fixed to 1 kHz for 16 MHz clock frequency, 500 Hz for 8 MHz, 250 Hz for 4 MHz, and so on. Since one needs at least one interrupt per 2 ms in order to avoid a flickering display, the MCU has to run on at least 8 MHz.
The display can be configured in various ways, and it is possible to either display single characters or entire strings — if you want, by scrolling the characters. In the former case — displaying single characters — one calls the display method and then the respective character is displayed until the next call is made. In the latter case, a string and some delay times are provided as parameters when the display method is called. When you want the MCU to do something useful (or to enter idle mode) while waiting for scrolling, the user can provide his or her own delay function. By the way, the string can either be an ordinary character array, a PROGMEM string, or a string embedded in an F(…) macro call.
Usage
When you want to display a single character c, call Dot5x7.show(c). A string can be displayed, e.g., as follows: Dot5x7.showString("Hello World!", 500, 100). This displays the string “Hello World!”, where each character is displayed for 500 msec and there is a pause of 100 msec between characters. One can also use the F() notation to pass a string that is stored in flash memory, i.e., Dot5x7.showString(F("Hello World!"), 500, 100). In addition, one might pass a string stored in flash (which has been defined with PROGMEM) using the _P-variant of the method, i.e.: Dot5x7.showString_P(str, 500, 100), provided str has been defined as const char PROGMEM str[] = "Hello World!";.
In addition, there are methods that scroll a string through the display. Scrolling can be done vertically up, down, or horizontally left or right. For example, one can scroll the “Hello World” string by calling Dot5x7.scrollLeftString("Hello World!", 300, 50, 1). This will scroll the string to the left, displaying each character for 300 msec in the middle of the display and using 50 msec for each shifting step. The final argument of 1 means that one blank column is used between two consecutive characters. There are also methods for scrolling right, up, or down. Further, one can, of course, use the F() notation and there are also the _P variants of the methods.
Configuration
The row and column pins can be specified when calling the begin method. In addition, you can specify the polarity of when the row and column pins are active, respectively. The default is that row pins are active LOW and column pins are active HIGH. This corresponds to driving a column anode display directly from the pins.
In addition, there are a few methods that control the interface:
setUpsideDown(bool enable)controls whether the characters are displayed upside-down.setFont(const byte *f)can be used to select an alternative font array.setFramesPerSecond(int fps)is used to control how often a complete matrix is displayed. The default value is 50 and one should not select values below 42. This is only effective if Timer1 is used.setBlinkFrames(int blinkon, int blinkoff)controls blinking by specifying the number of frames where the character is displayed and the number of frames when the display is off. If either value is 0, no blinking will happen.setDelayFunction(void (*f) (long unsigned int))enables one to specify a custom delay function that is to be used when theshowStringandscrollXXXStringmethods are used. This may be used in order to minimize power consumption or to communicate with peripherals.sleep()disables the timer interrupt and switches off all LEDs.wakup()restarts timer interrupts.
Finally, there exists the compile-time option USETIMER0, which when defined in DotMatrix5x7.h leads to using Timer0 (the timer for millis and delays) instead of Timer1, as mentioned above.
Example
Let us consider a small example.
// Simple sketch to display a character and a string
#include <DotMatrix5x7.h>

void setup()
{
    Dot5x7.begin(0, 1, 2, 3, 4,         // column pins
	         5, 6, 7, 8, 9, 10, 11, // row pins
	         LOW,                   // value when row pin active
		 HIGH);                 // value when column pin active
    Dot5x7.setFramesPerSecond(50);      // display 50 frames per
                                        // second (default value)
}

void loop()
{

    Dot5x7.scrollLeftString(F("Hello World!"), 300, 50, 1);
                                          // scroll string to the left
                                          // 300 ms static display of char
                                          // 50 ms for one scroll step
                                          // 1 empty column between chars
    delay(2000);
}
This would then lead to an output as in the following video.
Leave a Reply